Guides / Using the editor
Using the editor
Edit your Highlix recordings or your own videos: timeline, keep and cut, split, drag, undo, versions, 16:9 and 9:16, sound lines, transitions, text, looks and speed.
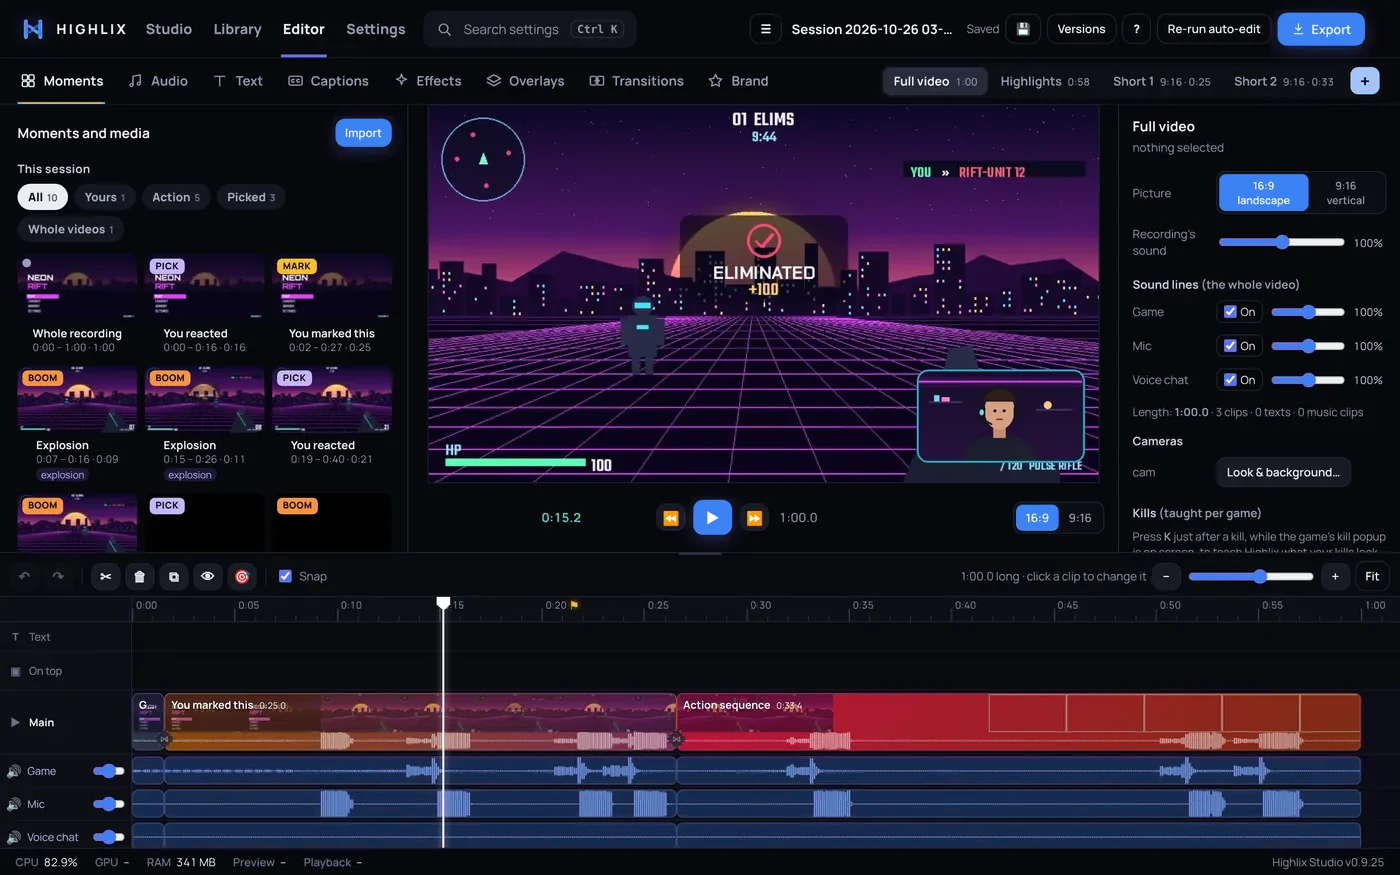
Finding your way around
- Left: tabs for Media, Audio, Text, Overlays, Brand, Captions, Transitions and Effects.
- Centre: the preview, with play controls and a 16:9 / 9:16 switch.
- Right: properties for whatever you've selected: the whole video, or a clip.
- Bottom: the timeline, with text and overlay rows, the main line, and a sound line each for game, mic and voice chat.
- Top: your versions as tabs (Full video, Highlights, Shorts), plus Save, Versions, Re-run auto-edit and Export.
Changes save on their own. Ctrl+S saves straight away, and ? shows every shortcut.
Edit any video, not only Highlix recordings
The editor isn't limited to sessions Highlix recorded. You can bring in your own videos, pictures and music and edit them with the same tools.
- Import your filesDrag videos or pictures from Explorer onto the editor, or press Import or Browse in the Media tab. Drag music and sounds onto the Audio tab, or press Import there.
- Put them on the timelineDrag a video onto the timeline, or press + Add. It becomes a clip like any other, so you can cut, split, keep or cut, move, add text, captions, looks, speed, transitions and overlays.
- Or let Highlix edit themChoose Auto-edit my videos to get a full video, highlights and Shorts from files that weren't recorded by Highlix.
- Export for where it's goingChoose 16:9 landscape (for example for YouTube), or vertical 9:16 for Shorts, Reels and TikTok. See export sizes.
Your files stay where they are on your PC, and Highlix never changes your originals. Only use videos, pictures and music you own or have permission to use. See your own media.
Cut, keep, split and move
- Click a clip on the timelineIt plays from there and its properties appear on the right.
- Keep or cutPress Keep / Cut or Delete to switch a clip out of (or back into) the video. Nothing is deleted from the recording.
- SplitPut the playhead where you want the cut and press S (or the scissors button) to split the clip in two.
- DragDrag a clip to move it, or drag its edges to trim. Snap helps things line up.
- UndoPress Ctrl+Z to go back a step.
Right-click a clip for quick actions: play from here, split, duplicate, take out, mute, volume, and more. Right-click a sound line's name to mute it or change its volume.
Versions and picture shape
- Each version (Full video, Highlights, each Short) has its own timeline. Press + to add another.
- The Versions button lets you save and go back to earlier states of your edit.
- 16:9 landscape / 9:16 vertical switches a version's shape. Use 16:9 for landscape video and 9:16 for Shorts, Reels and TikTok. The picture follows the layouts you set in Studio: cameras where you placed them, and the game over a blurred, black, picture or colour background in vertical.
Sound lines
Your game, mic, voice chat and any extra sources each have their own line under the main track, with a mute and a volume slider.
- Each clip can also have its own level for each line, so you can duck the game just for one moment.
- The editor and the export use the same sums, so what you hear is what you export.
- Press M to mute the selected clip or line.
Transitions
Open the Transitions tab (or an overlay pack's stinger) and add one on the main line. A transition belongs to the clip before the cut, so it stays on its cut when you move, trim or split clips. There's also an option to put one between all clips at once.
Text and animations
- Open the Text tab and add textOr right-click empty timeline and choose add text.
- Type it, then drag it on the pictureChoose from 26 bundled fonts, size, bold or italic, shadow, outline, background and alignment.
- Pick an animationIt can come in with a fade, pop, zoom out, slide, drop and bounce or typewriter, and go out with a fade, pop, zoom in or slide. Each has its own length.
Colour looks
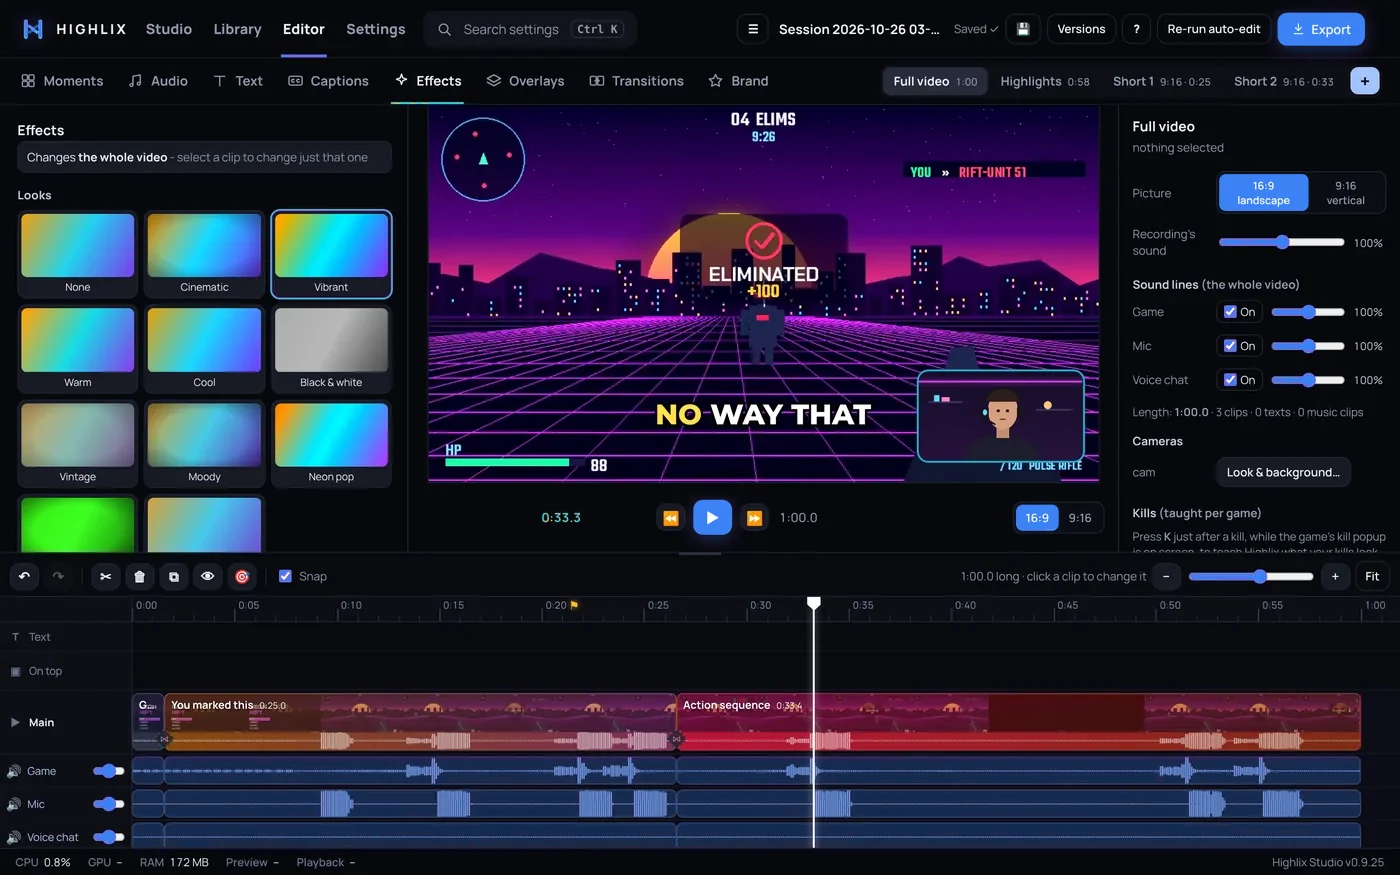
In the Effects tab, pick from ten looks: Cinematic, Vibrant, Warm, Cool, Black & white, Vintage, Moody, Neon pop, Night vision and Arctic. Each has a strength slider, and there are sliders for brightness, contrast, saturation, warmth, tint, faded blacks and vignette.
- With a clip selected, the look changes only that clip. With nothing selected, it changes the whole video.
- A clip's own look wins over the whole video's.
Speed and speed ramps
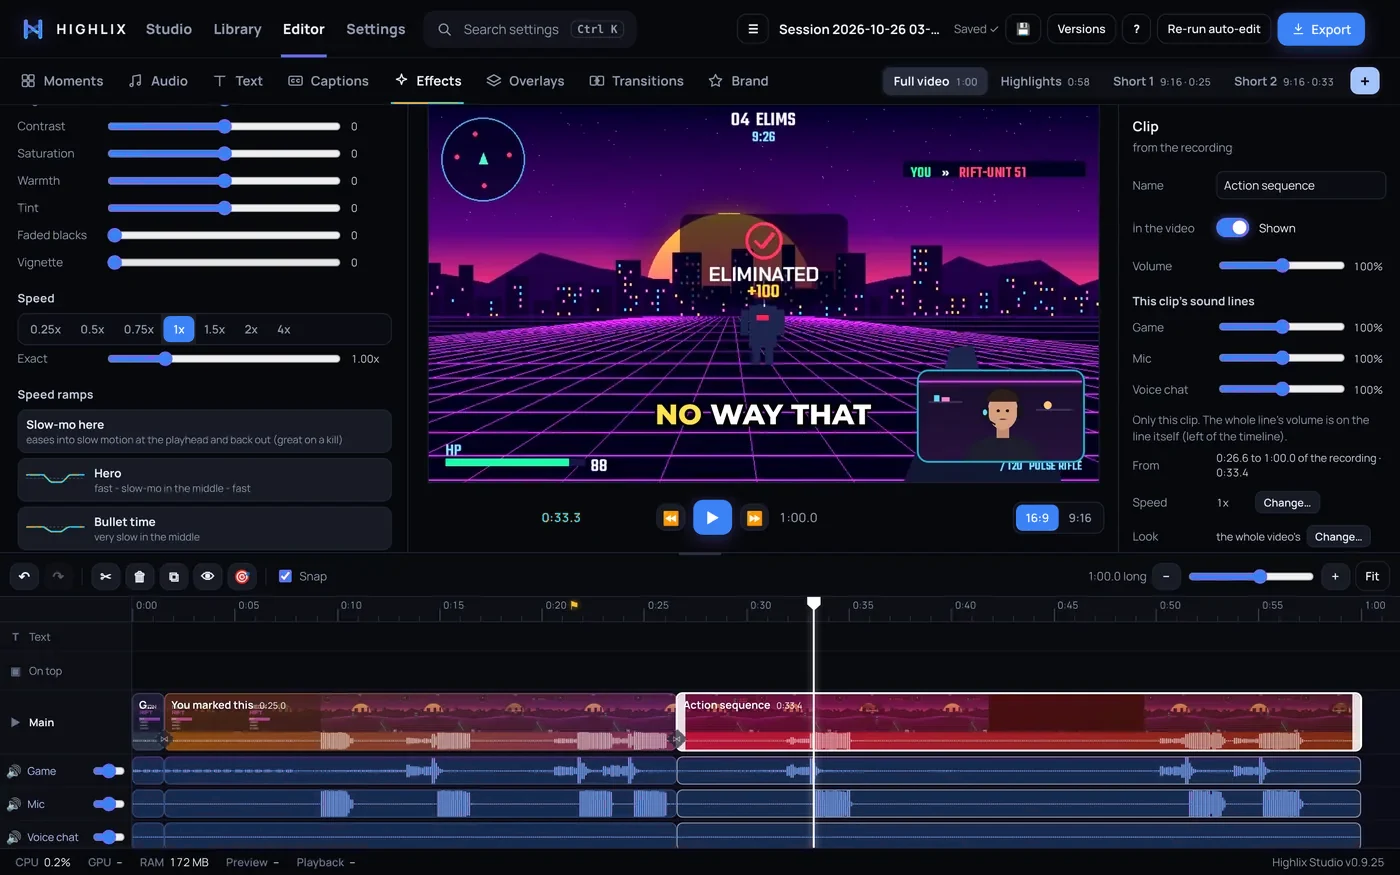
With a clip selected, choose a preset (0.25x up to 4x) or set an exact speed from 0.1x to 4x. The picture, sound lines and cameras all follow, and sound keeps its pitch.
Speed ramps split a clip into parts at different speeds: Hero (fast, slow-mo in the middle, fast), Bullet time, Flash in, Flash out, Montage, and Slow-mo here, which eases into slow motion at the playhead and back out. It's great on a kill. Take the speed ramp off joins the clip back up.
A transition can't land inside a speed ramp.